Aljezur farmhouse index
Robland X-31 additions
Thicknesser scale
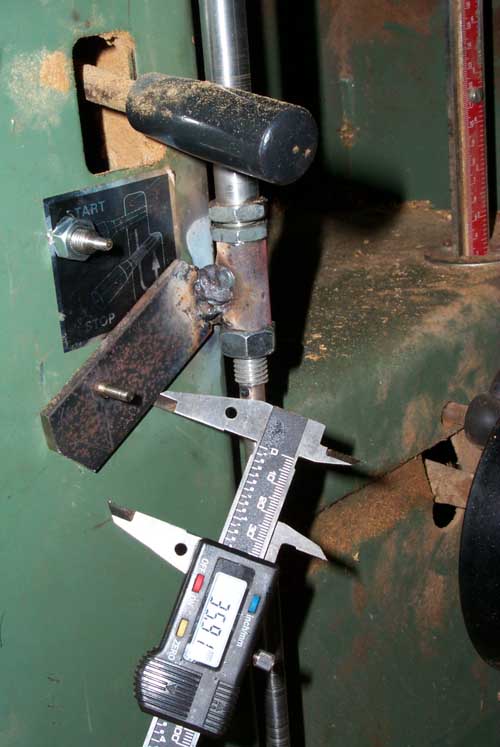
It was surprisingly easy to drill the pinholes in the caliper. I thought I'd need a cobalt bit, but I just used a good quality hss bit in a drill press.
The mounting pins are stainless steel. The upper is made from threaded rod, and threaded for a 4mm locknut. Sorry about the bad weld, not my usual standard.
Mountings are by drilling and tapping for the bolts.
The adjustability is important [note the nuts on the threaded rod behind the calipers], so that the calipers will be correctly calibrated when removed, closed, and zeroed. just cut a board, measure with the calipers, set to zero, mount on the pins, then adjust the locknuts until it's zero again. I can now set my thicknesser to within 0.1mm in a few seconds.
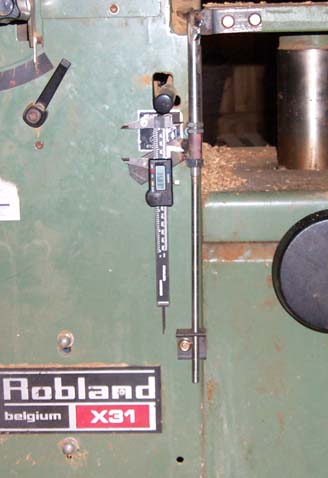
Simply a rod attached to the thicknesser table; I added a brace below to give it some kick and bonk resistance.
Far better would be a "vertical mill scale" that would cover the entire travel of the table. But they cost $60-80, and besides, I didn't have one on hand the day I decided to build this.
The caliper only cost $14, I already had it, and it's still usable for other things when I'm not using the thicknesser.
Router extension table
By Mark Holden Mark@aljezurfarm.com
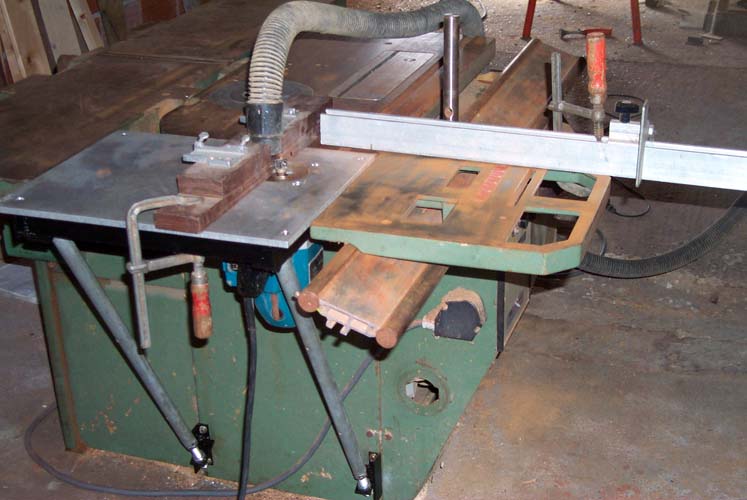
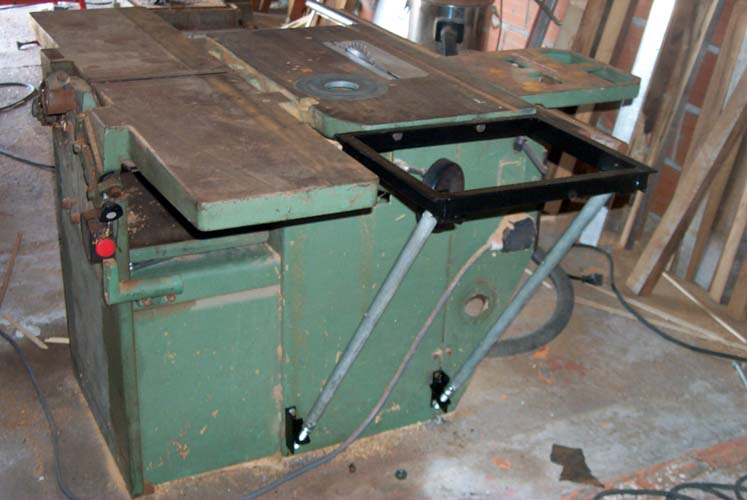
It might seem strange to add a router table to a machine that already has a 3 HP shaper in it; but it was either that or spend $2000 on shaper cutters to replace the router bits I already have.
Budget for this job; $0. It was all scrap and leftovers I had lying around. therefore some of the decisions on build might be different to what I would have done if I'd have had to buy everything.
I'm going to assume fabrication skills, and pretty much just show pictures. Measuring and layout are the tricky operations in this job, you need some very accurate drilling and cutting.
The cool thing is this machine has a sliding side table and adjustable fence.
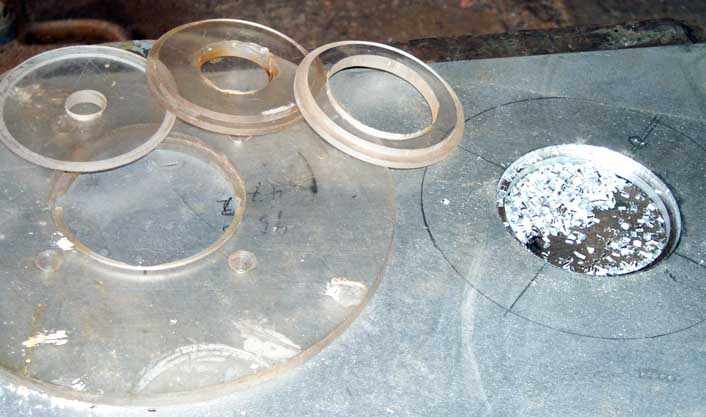
This is my circle cutting base for my hardworking old Makita router. The pivot pin is highlighted by the arrow.
A problem is that you really need a router table to make one of these, and you need one of these to make a router table. I actually made a temporary router table just to make this base with. Note the rebated screw slots.
It's made from polycarbonate. Sold as Lexan in the US. a very strong [bulletproof even] plastic.

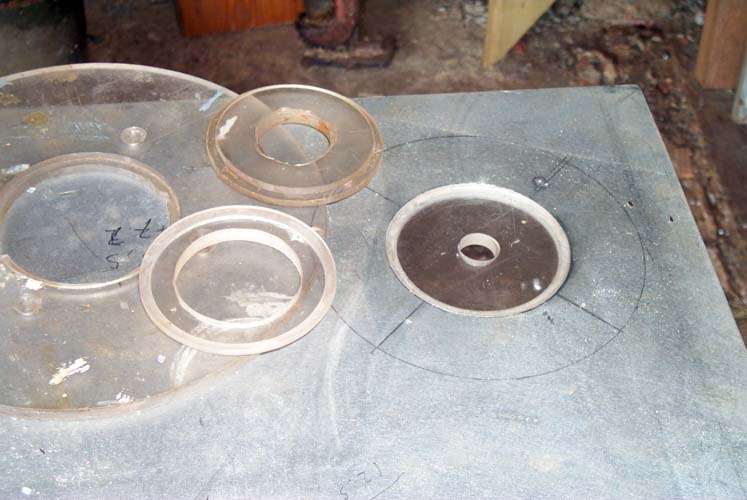
Here I've clamped my template onto the 3/8" [10mm] aluminum table top. and cut the rebate for the inserts. The base hole was made with a holesaw in a drillpress.
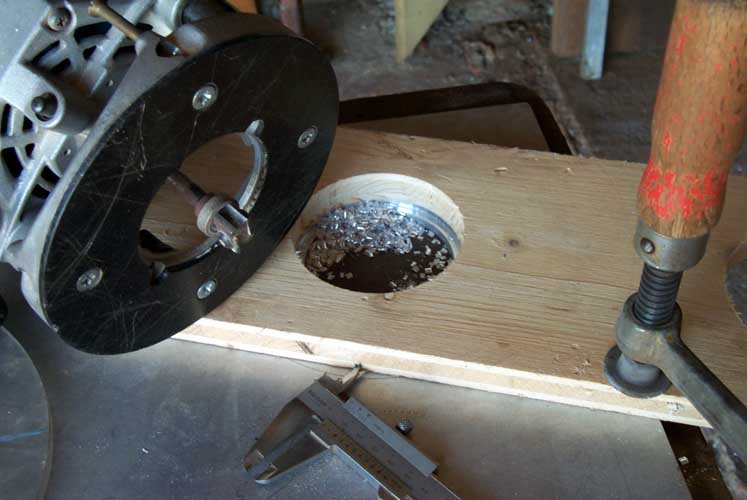
These are the inserts and router base from my last router table, all made with the circle cutter above. these things have done a lot of work for me over the years. I'm going to use the old inserts with my new table.
Success! careful measuring paid off, and the inserts fit level and snug in the new table. If I'd made a mistake, I would have made new inserts from aluminum on the lathe.
The frame is simply welded angle iron, drilled and bolted to the cast iron table edge. I screwed up and missed the holes by 1mm; a little filing of the holes was required to get the tables to line up.
Note the adjustable legs; they're bottomed with 16mm [5/8"] threaded rod. they also screw into the frame on top so it can be dismantled and stored or transported. the bottom pieces are welded and drilled steel, bolted to the machine base.
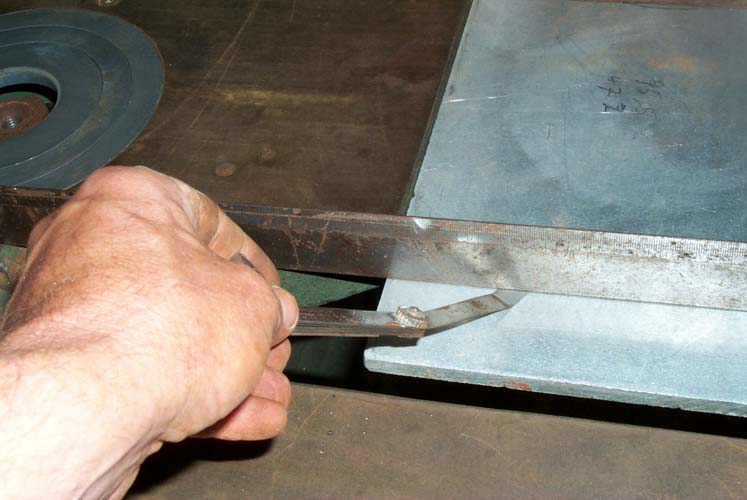
Here's how I adjust the tables and line them up flat. a very straight straight edge [machined, ground] and an automotive feeler gauge, and it's easy. 0.08mm is what I use; that's as flat as my cast iron saw table. The same method is good for lining up the planer tables and sliding side table. Just slide the feeler gauge around, and you'll feel where it's out. Adjust and check again.
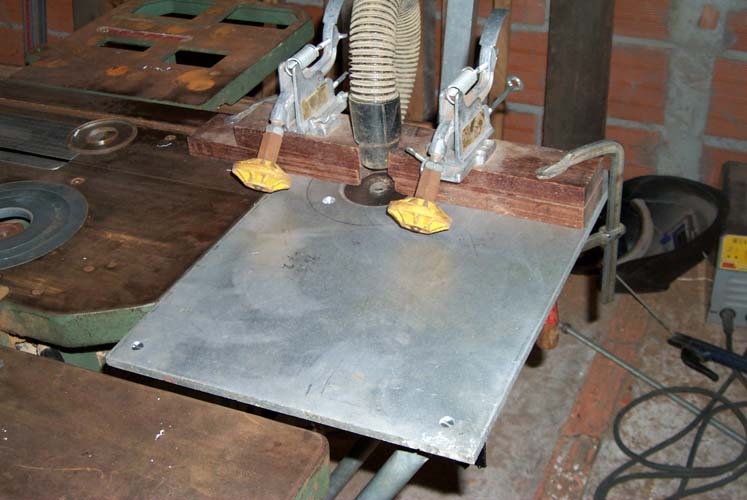
This is my old fence, I've been using it for years. a piece of scrap hardwood with a hole in the edge that surrounds the cutter and holds a vacuum cleaner hose. It works great, and sure was fast and cheap to make!
I bought the sprung hold-down anti-kickback rollers by mail from the US many years ago. I think they're not available anymore, which is really too bad. You'll have to use a feather board; I never had much success with them myself.
You can drill and tap the table for hold-downs if it's metal, but I didn't bother. Clamps work fine.
I recommend "The router book" by Patrick Spealman. Many of the ideas used here are his.